Like most people who train through positive reinforcement, I use a lot of training treats. Doubly so because I am often using them for client’s dogs etc. That means my treat budget is pretty extensive compared to a lot of my other expenses. And as we all know the best treats with the best ingredients are kind of expensive.
Another concern is for dogs who have strict dietary restrictions, getting away from common allergens like chicken, or rosemary can be really challenging. Not to mention expensive. And none of us really want to give more money to amazon or chewy. So I have a homemade training treat that is amazing! Dogs love it and it’s super easy to make! (Not to mention cheap.)
For the recipe I made here I use multiple kinds of baby food, but you can use a single flavor, or any combination you want. The key is to use the flour to help balance it out. The first time I made these I just baked the baby food, the results were tasty but mostly flavored air crisps. They crumbled with the slightest touch, and were mostly air. Obviously this is not ideal for storing in a treat pouch.
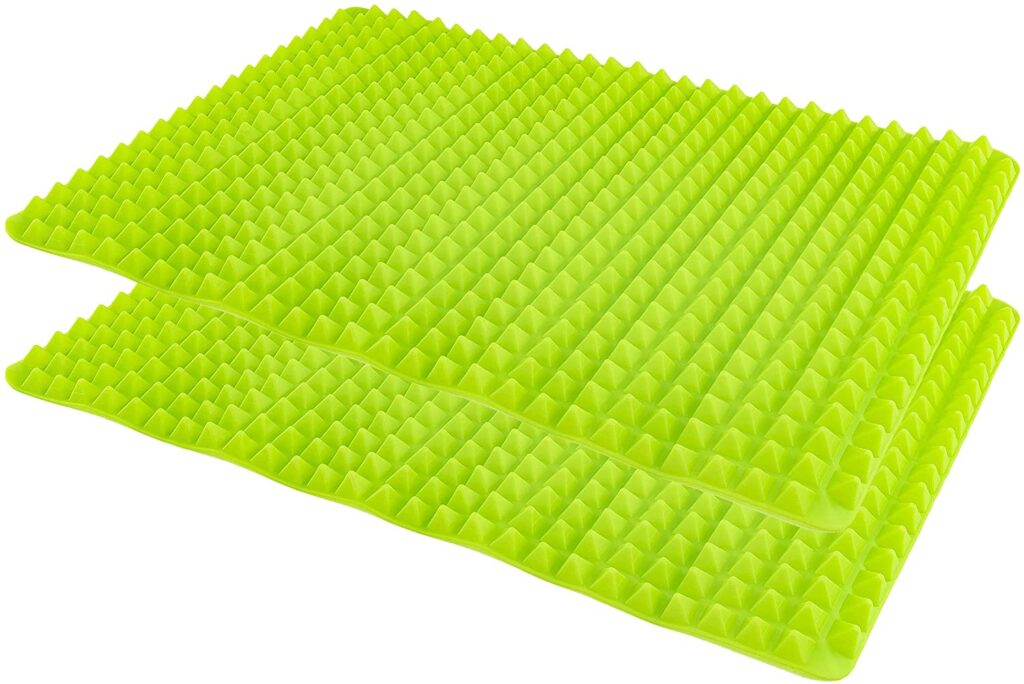
What you need: mixing bowl, spatula, large baking sheet, silicone triangle mat.
Basic Recipe:
13 to 14oz baby food
1 cup flour
- Preheat oven to 350 degrees F.
- Mix together baby food and flour to form a consistency that is thicker then the baby food, but easy to spread.
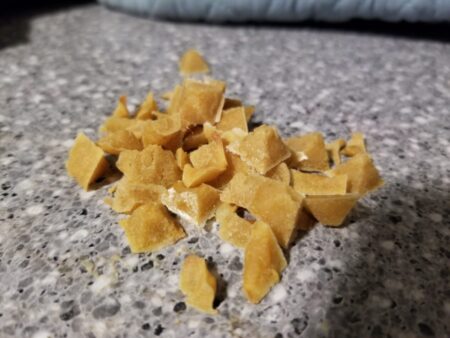
- Spread in inverted silicone trays. I just glob it in the middle and spread it out, scraping off any excess so it’s all level. I don’t really worry about the edges since the goal here is to create treats as easily as possible and I am not detail oriented. At all.
- Bake. 10 to 13 minutes, I kind of eye ball them if they look like they are going to burn I take them out.
- Let cool enough you can dump them out. They will pop right out of the silicone tray, I just roll it and out they come. I do not grease the tray ahead of time.
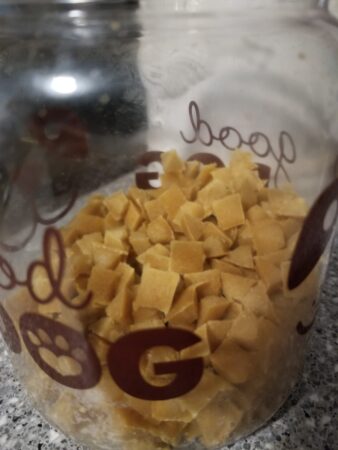
- Let cool completely, toss into a jar for storing. I do keep them in the fridge when not in use since I don’t dry them into hard rocks, and there are no preservatives in them. You want them to be cool completely before storing because the heat escaping will create steam that will make them too soggy long term.
- Let your dog lick the bowl.
For this recipe I used 4oz Apple, 4oz pumpkin, 2.5oz Chicken and 2.5oz turkey. You can use any combination of flavors. You could even use peanut butter but if you do you might want to adjust the flour content to ensure you don’t end up with a paste that is too difficult to spread. I like using baby food because you can control the ingredients, and make sure you aren’t accidentally getting something in there that is not diet approved for dogs who are restricted, or need to manager their calories. (I haven’t experimented with using canned dog food yet, I am planning too soon though! But with canned food there are often a lot of additives and stabilizers that I don’t necessarily care about, but also don’t really need to add when baby food is pretty cheap and easily obtained. Also with canned food you will need a pate variety with no “chunks” unless you want to take the step to run it through a food processor first. No chunky, all smooth.)
It is really that easy. And I have two trays, I filled them both completely and baked them. There was a little batter left over that I split between the dogs and let my youngest lick the bowl before putting it all in the dish washer. (The trays can go through the dish washer too!)
Voila. Easy, delicious, entirely customizable dog treats! No spending half your day cutting hot dogs, or cheese. All in all when I make these it takes maybe half an hour. And most of that is just baking the trays (I bake them one at a time since my oven isn’t super large.)
Let me know if you try them!